You clean your counter tops, mop the floors and even scrub your oven, but when was the last time you cleaned your kitchen exhaust fan? If your answer is “never” or “wait… I’m supposed to do that?” You’re not alone. Over time, grease, smoke and lingering odours quietly build up, turning your exhaust fan into a hidden mess. Cleaning it is not only essential for the sake of maintaining hygiene and air quality inside the kitchen, but it’s also essential for maintaining the safety and functionality of your cooking space.
This article provides step by step instructions and expert suggestions for successfully cleaning your kitchen exhaust fan, allowing you to easily remove grease, smoke residue and persistent kitchen odours. Whether you're a homeowner looking to maintain appropriate kitchen hygiene or a tenant planning for expert Vacate Cleaning Perth, this guide will guarantee your kitchen meets the highest cleaning requirements.
1. Why Kitchen Exhaust Fan Cleaning is Essential?
A neglected kitchen exhaust fan can easily become clogged with grease, dust and food particles. This buildup inhibits airflow, making it ineffective at removing smoke or odours from the kitchen. Furthermore, extra grease can drip back onto your stovetop, raising the risk of a fire and making your kitchen less sanitary.
Regular maintenance not only extends the appliance's life, but also improves energy efficiency and indoor air quality. For tenants, this cleaning activity is critical before the final inspection under strict Vacate Cleaning Perth scenarios, as it will help you recover your bond payment.
2. Safety First: Preparing for Cleaning

Before commencing the cleaning procedure, take some basic safety steps, such as turning off the power to the exhaust fan to avoid electrical hazards. Always wear gloves and, if required, a face mask to protect yourself from strong cleaning agents and oil that has accumulated over time. Place towels or newspapers down below to catch running grime and to avoid damaging your countertops and stoves.
If you are working with a highly dirty fan, it may be best to call in a professional, particularly for thorough Vacate Cleaning Perth where the standards are high and even a slight oversight could result in fines.
3. Removing and Cleaning the Filters
Most kitchen exhaust fans include a removable mesh or charcoal filter. These are the first line of defence against airborne grease and smoke. If your exhaust had a mesh filter, soak it in a solution of hot water, dish soap and baking soda. Let it sit for 20–30 minutes, and then scrub gently with a brush. In the case of charcoal filters, these should not be cleaned; rather, they need to be replaced according to the manufacturer's recommendation—usually every six months.
After the cleaning is done, allow the mesh filters to dry completely before reinstalling them. A clean filter will dramatically improve the airflow inside your kitchen and will help in better smoke and odour control inside the space.
4. Degreasing the Fan Blades and Housing
Once the filters are clean, it’s time to tackle the fan blades and inner housing. These components tend to collect most of the grease.
- Spray a degreaser or a homemade vinegar and baking soda mixture directly onto the blades.
- Let it sit for a few minutes to loosen the grime.
- Clean it with a non abrasive cloth or sponge and a toothbrush for tight corners.
Take special notice of any sticky residue, since this is usually the cause of residual odours and can severely hamper fan performance.
5. Cleaning the Exterior Surfaces
The outside of your kitchen exhaust unit also needs attention. Dust, oil splashes and smoke particles settle on the surface, creating a greasy film that attracts more dirt over time. Wipe down the hood, control panel and visible ducts with a mixture of warm water and mild detergent; for stubborn spots, use a degreaser or a paste of baking soda and lemon juice.
Polishing the exterior not only improves the appearance of your kitchen, but also demonstrates your dedication to cleanliness. This is especially vital during property inspections or when hiring reputable Vacate Cleaning Perth services to take care of your cleaning needs.
6. Eliminating Odours for Good
Even after cleaning, lingering odours can remain trapped in the fan or kitchen walls. Here are a few natural solutions to take care of it. Boil lemon slices or vinegar on the stove to neutralise smells and keep the windows open both during and after cooking to improve ventilation in the area. You can also place activated charcoal or coffee grounds near the exhaust area to absorb remaining odours. These simple habits help maintain a fresh smelling kitchen long after the fan has been cleaned.
7. Establishing a Regular Cleaning Schedule
A onetime deep clean is wonderful, but consistency is needed to maintain that cleanliness.
- Weekly: Clean exterior surfaces with wiping and remove small grease accumulation.
- Monthly: Remove and clean filters.
- Biannually: Deep clean the fan blades and housing.
This schedule keeps your exhaust fan running at its best all year long, keeps you from incurring expensive repairs and ensures a clean and safe kitchen atmosphere so that you can continue to cook hearty dishes in the space.
Tips to Remove Grease, Smoke & Odour from Your Exhaust Fans

Wrapping Up
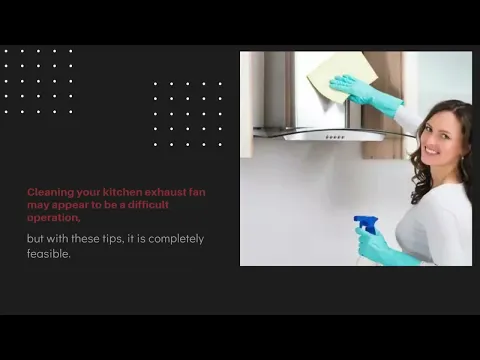
Cleaning your kitchen exhaust fan may appear to be a difficult operation, but with the correct equipment, a systematic approach and a little elbow grease, it is completely feasible. Regular maintenance may remove grease, smoke and smells, making your kitchen healthier and more enjoyable to use. So, stick to a cleaning routine and your fan will reward you with superior performance, cleaner air and peace of mind. Happy cleaning!